
By 6:15 p.m. on a late-October Friday, the porch lights are already glowing on a Halifax street. A damp wind rattles the maples, the thermometer reads 7°C, and the pumpkin picked up after Thanksgiving is waiting beside the door — still whole, slightly muddy and full of potential. Across the country, families face a different version of the same annual challenge: Vancouver rain can turn a carved pumpkin soft in days, while Winnipeg may dip below 0°C before Halloween, leaving a frosty grin on the porch.
Carving a jack-o’-lantern is one of those wonderfully messy family traditions that children remember long after the last candy wrapper has disappeared. It can also involve slippery pulp, flimsy stems, overly ambitious designs and the inevitable question from a keen six-year-old: “Can I use the big knife?”
The good news is that a cheerful, sturdy pumpkin does not require professional-level carving skills — or a frighteningly sharp kitchen blade. A firm, medium-sized carving pumpkin, a washable marker, a kid-safe saw and a simple face with wide eyes and a bold smile will usually look better on the front step than an intricate design that snaps in the first cold wind. Aim to scrape the interior walls to roughly 2 to 3 centimetres thick: thin enough for an LED light to shine through, but strong enough to handle a damp Ontario evening or a gusty Calgary chinook.
This guide will help your family choose a pumpkin that can last, set up a low-mess carving station and give every child an age-appropriate role, from drawing triangle eyes to sorting seeds for roasting. You’ll also find practical ways to protect your finished creation from rain, frost and early darkness — because the best jack-o’-lantern is not the fanciest one. It is the lopsided, glowing face your child proudly points out to every trick-or-treater.
Pick a Porch-Ready Pumpkin That Will Last Until Halloween
The best family jack-o’-lantern starts at the patch, farm stand or grocery store—not at the carving table. A lovely-looking pumpkin with a soft patch or cracked stem can turn mouldy before Halloween, especially in damp coastal weather or during a mild October stretch in southern Ontario.
For carving, look for a medium-sized pumpkin with enough room for a bold face but not so much weight that it is awkward for children to handle. A pumpkin around 20 to 30 centimetres wide is often the sweet spot for most families. It is big enough for triangle eyes, a wide smile or a simple animal silhouette, yet still manageable on a kitchen table.
You will usually see three broad types of pumpkins:
- Large decorative field pumpkins: Great for a front-step display, though their thick walls can be tougher to cut and scoop.
- Carving pumpkins: Usually rounder, smoother and a little easier to hollow out. These are the most practical choice for a traditional lantern.
- Cooking pumpkins: Smaller, denser varieties such as pie pumpkins are excellent for soup or baking, but their compact size leaves less space for a child-friendly design.
At a Canadian pumpkin patch, let children help choose the colour and shape, but have an adult do the inspection. A good carving pumpkin should have:
- A firm shell with no spongy areas
- A dry, solid stem that is still attached
- A flat or nearly flat bottom
- Even colouring, usually deep orange or orange-red
- No mould around the stem or underneath the pumpkin
- No deep cuts, bruises or frost-damaged patches
Lift it from the bottom rather than carrying it by the stem. Stems break easily, and once they do, the pumpkin can spoil faster.
Shape matters, too. A low, wide pumpkin is stable and forgiving, especially for little ones drawing their first face. It works beautifully for broad smiles, monster mouths and simple maple-leaf cut-outs. Taller pumpkins suit the classic spooky face, with stacked triangle eyes and a long toothy grin, but they may wobble more on an uneven porch.
Timing depends on where you live. Families in Vancouver or Victoria can often buy pumpkins in early October, though rain and mild temperatures can shorten the life of a carved display. In Winnipeg, Edmonton, Saskatoon and many northern communities, frost can arrive early. Buying after Thanksgiving and carving a few days before Halloween generally produces the freshest result.
Store an uncarved pumpkin somewhere cool, dry and sheltered. A garage, enclosed porch or covered mudroom is usually better than a warm kitchen. Aim for roughly 10 to 15°C if possible. Avoid freezing conditions, direct sun and damp concrete, which can trap moisture underneath.
A quick patch-side checklist:
- Is the pumpkin firm all around?
- Does it sit flat without rocking?
- Is the stem intact?
- Are there any soft spots, mouldy areas or splits?
- Is it a size your child can safely help decorate?
- Will it fit comfortably where you plan to display it?
A sturdy pumpkin gives the family more time for the fun part: making a face that glows warmly in the early evening dark.
Set Up a Low-Mess Carving Station for Kids
Canadian October weather does not always cooperate with porch carving. A drizzle in Halifax, cold wind in Calgary or a wet Vancouver afternoon can quickly turn a cheerful activity into a slippery, shivery one. Set up indoors, in a garage or on a covered patio instead. The goal is simple: bright light, stable surfaces and a mess that stays contained.
Choose a sturdy table at a comfortable height for adults and children. Cover it with a washable vinyl cloth, old shower curtain, flattened cardboard boxes or several layers of newspaper. Compostable paper liners can work well, too, particularly if your municipality accepts food-soiled paper in the green bin.
Gather supplies before anyone touches the pumpkin:
- Washable marker or dry-erase marker
- Large bowl for seeds and pulp
- Spoon, scoop or pumpkin scraper
- Child-safe pumpkin carving kit with small serrated saws
- Cookie cutters and a rubber mallet for low-carve designs
- Tea towels or paper towels
- Disposable gloves for adults handling slippery pulp
- Battery-operated LED tea lights or puck lights
- A baking tray if you plan to roast seeds
Keep kitchen knives out of the activity. They are sharp, smooth-bladed and prone to slipping on the tough, curved shell. Pumpkin carving saws are designed to cut slowly with short strokes, making them a safer choice when adults are supervising. If you do not already own a set, our guide to pumpkin carving kits and tools compares five options from $16. Even then, children should only use tools suited to their age and ability.
Good lighting is part of pumpkin carving safety. Work under bright overhead lights or near a window before sunset. A dim garage is not the place for detailed cutting. Keep towels nearby to dry hands and tools; pumpkin pulp can make handles slick.
Assign jobs based on age rather than expecting every child to carve.
Toddlers can choose a face, stick on felt eyebrows, sort clean seeds or place an LED light inside once an adult has finished the cutting. Preschoolers can draw large features with a marker, help scoop with a spoon and press cookie cutters into the shell while an adult holds the pumpkin steady. School-aged children can scrape the interior, trace patterns and, with close supervision, use a pumpkin saw on simple, wide openings. Adults should cut the main access opening, handle narrow or complicated shapes, and inspect the finished lantern for sharp edges.
For less mess, cut the opening in the bottom rather than the top. Set the pumpkin over a bowl or compost liner, remove the base, then scoop downward. The top stays intact, and there is no lid to collapse into the cavity later.
If you plan to eat roasted seeds, separate them from any spoiled flesh. Seeds from a firm, fresh pumpkin are fine to wash and roast; discard anything that smells sour, looks mouldy or has sat at room temperature for too long. Wash hands, utensils and work surfaces after handling raw pumpkin, particularly before preparing snacks.
When the work is done, scrape loose pulp into the green bin where local rules allow. Toronto, Ottawa, Winnipeg and many other municipalities accept pumpkin scraps, but rules vary. A quick check of your local collection guide prevents a well-meant compost bag from becoming contamination.
Carve a Classic Face Without Reaching for a Kitchen Knife
A classic jack-o’-lantern does not need intricate teeth, tiny stars or a complicated stencil. In fact, large, well-spaced shapes usually glow better and hold up longer through rain, wind and frosty nights. Start with a friendly face and use safe tools deliberately.
First, wash the outside of the pumpkin with cool water and dry it thoroughly. Dirt can make a marker line harder to see and leave the shell slippery. Place it on a tea towel or non-slip mat so it cannot roll while you work.
Draw the whole design before cutting. A washable marker is ideal because you can adjust an eye or widen a smile without permanently marking the shell. For a first-time family project, use two large triangles for eyes, a simple nose and a broad curved mouth. Leave at least 2 to 3 centimetres of pumpkin between each cut-out. Those solid sections, often called bridges, keep the face from snapping.
For access to the inside, a bottom opening is generally the most practical. Adults can cut a circle or square large enough to reach through—usually about 12 to 15 centimetres across on a medium pumpkin. The advantages are clear: the pumpkin remains stronger around the stem, there is no lid to fall in, and the finished lantern can be lowered over an LED light.
A back opening also works, particularly if you want the pumpkin to sit flush against a wall. A top opening is traditional, but it can weaken the stem area and the lid may shrink, warp or drop into the cavity after a few damp days.
Once the opening is made, remove the seeds and stringy pulp with a large spoon or scoop. Scrape the inner walls until they are about 2 to 3 centimetres thick around the face. Thinner walls allow more light through, but do not over-scrape or the pumpkin may collapse. The interior does not need to be perfectly smooth; focus on the area behind the facial features.
Adults should make the main cuts using a serrated pumpkin saw. Hold the pumpkin steady, cut away from your body and use short, controlled strokes. Never force the saw. If it catches, pull it back, reset the angle and continue slowly.
For younger children, there are several safer alternatives to cutting all the way through:
- Trace the face with a marker and let an adult cut it later.
- Use a push-pin tool to poke small holes along a design.
- Tap cookie cutters through the shell with a rubber mallet.
- Shave away only the orange outer skin for a glowing, shadowy effect.
If something goes wrong, do not panic. A broken tooth can become a gap-toothed grin. A snapped narrow strip may be repaired with toothpicks pushed in from the inside, though a wider redesign is often sturdier. Uneven eyes can be balanced by enlarging the smaller one. If the pumpkin wobbles, shave a thin slice from the bottom—but only an adult should do this, and only after removing the LED light.
If the face looks dim, scrape a little more flesh from behind the eyes and mouth. Then place the light inside and test it before carrying the pumpkin outdoors. A quick glow check saves frustration on Halloween night.
Try Easy Designs That Let Kids Take the Lead
Children tend to prefer pumpkins with personality over pumpkins that look like professional carvings. A lopsided smile, giant round eyes or one funny tooth often becomes the family favourite. Keep the design bold, cheerful and easy to recognize from the sidewalk.
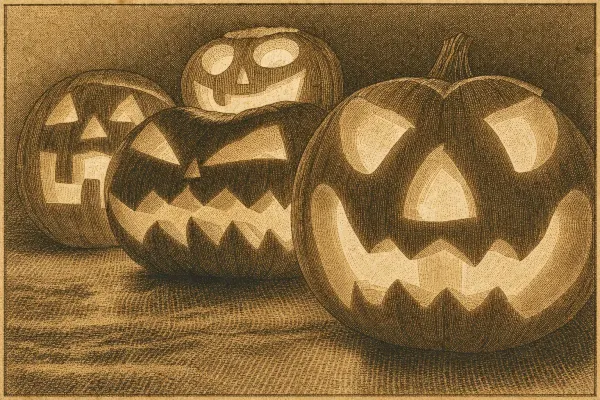
The simplest option is the traditional face: triangle eyes, triangle nose and a wide zigzag or curved smile. It is ideal for preschoolers who can draw the features with a marker before an adult cuts them out. Make the mouth broad rather than detailed, and keep the teeth chunky. Narrow fangs may look dramatic at the table but often break once the pumpkin begins to soften.
Other easy lantern ideas for children include:
- Friendly monster: One big eye, two square teeth and a crooked grin.
- Happy ghost: Two large oval eyes and an open “O” mouth.
- Cat face: Wide eyes, a triangle nose and simple whisker slits.
- Owl: Two large circular eyes with a small beak.
- Bat: A round face with pointed ears cut into the upper edge.
- Simple maple leaf: Best as a shallow-scraped design rather than a fully cut-out shape.
- Hockey mask-inspired face: Use large circles and bold lines, avoiding any small holes.
- Not-too-scary grin: Big eyes, a curved mouth and three sturdy square teeth.
For a family porch lineup, choose a theme rather than giving everyone the same stencil. One person can make a bear, another an owl, another a fox and another a friendly moose. A row of woodland animals feels especially at home outside a cottage in Muskoka, a suburban Ottawa porch or a front walk in Kelowna.
Toddlers may be happier with no-carve options. Washable paint, stickers, adhesive felt shapes, yarn hair and marker faces all work well. A pumpkin covered in colourful dots, a goofy moustache and oversized paper eyes can be just as festive as a carved one. Use push-in accessories only with direct adult supervision, and remove anything small if the pumpkin will be within reach of babies or pets.
Adapt the activity to each child’s skill level. Younger children can choose the theme and draw the outline. Older children can scoop pulp, use a supervised pumpkin saw on wide shapes, or help tap cookie cutters into the shell. Adults should still take over for fine details, tight curves and any cut near the stem or bottom.
A few design rules make nearly every pumpkin look better:
- Draw features larger than you think you need.
- Leave wide, solid pumpkin sections between openings.
- Avoid long, thin pieces such as delicate eyelashes or narrow teeth.
- Use rounded corners where possible; sharp inside corners split more easily.
- Test the design with an LED light before declaring it finished.
If rain is in the forecast, simple designs have another advantage: fewer cut edges mean fewer places for water to collect. Your child’s one-eyed monster may last longer than the elaborate haunted-house scene next door—and it will probably be easier to spot in the dark.
Keep Your Pumpkin Fresh Through Rain, Frost and Temperature Swings
A carved pumpkin is a fresh food with its protective skin removed. Once it is opened, weather makes a major difference. Coastal rain can encourage mould, warm afternoons in southern Ontario can speed up softening, and Prairie frost can leave the shell watery and collapsed by morning.
The easiest way to keep a lantern looking good is to carve close to Halloween. If daytime temperatures are above about 10°C, aim for two to five days before October 31. In cooler areas, a freshly carved pumpkin may last longer, but freeze-thaw cycles can still do damage. An uncarved pumpkin can sit decoratively from Thanksgiving onward; save the actual cutting for the final week.
Remove as much pulp as possible from the inside. Loose strands hold moisture and create a place for mould to develop. Scrape the interior clean, especially behind the face, and wipe out any puddles before adding a light.
During mild weather, keep the pumpkin out of direct sunshine. A sheltered north-facing porch, covered stoop or shaded entry is often better than an exposed front step. Direct October sun can warm a pumpkin surprisingly quickly, even when the air feels cool.
Rain requires a different approach. A few drops are not disastrous, but heavy rain can fill the bottom cavity and soak cut edges. Put the lantern under an awning, beside a covered door or on a raised surface where water can drain away. Do not leave it sitting in a puddle or directly on damp soil.
When temperatures are expected to fall below 0°C, bring the pumpkin into a cool garage, enclosed porch or sheltered shed overnight. Hard frost can freeze the moist flesh, and when it thaws, the shell may turn soft and saggy. Avoid putting it in a heated home unless necessary; a warm room can accelerate decay.
If the pumpkin starts to look dry or shrivelled but is otherwise sound, lightly mist the cut edges with water. Do not soak it. Extra moisture is helpful only when the pumpkin is drying out, not when it is already damp or mouldy.
Check the lantern each day once it is carved. Discard it when you notice:
- Fuzzy mould around cut edges or the stem
- A strong sour or rotten odour
- Major collapse or leaking liquid
- Flies, slugs or other pest activity
- A shell that feels slimy or unusually soft
At the end of the season, skip the landfill if you can. Many Canadian municipalities accept pumpkins in curbside green bins, though decorations, paint, glitter and plastic accessories must be removed first. Backyard composting is another option if you break the pumpkin into smaller pieces. Some towns and conservation groups also run post-Halloween pumpkin collection days, where clean pumpkins may be composted or used in wildlife-safe programs.
A little weather planning lets your family enjoy a glowing porch display without watching it turn to mush before trick-or-treaters arrive.
Light the Porch Safely for Early Halloween Darkness
By late October, darkness settles in early across Canada. In St. John’s, Thunder Bay, Regina and Vancouver, many families begin seeing trick-or-treaters before supper dishes are cleared. A glowing jack-o’-lantern makes the porch feel welcoming, but the safest light source is battery-operated.
LED tea lights are the easiest choice. They are inexpensive, cool to the touch and available in flickering versions that mimic a candle flame. Small LED puck lights are brighter and can be useful for larger pumpkins or designs with thick walls. Choose warm white or amber lights for a traditional orange glow; colour-changing lights can be fun for monster faces or painted pumpkins.
Glow sticks are another low-risk option, especially for a one-night display. They create a softer light than LEDs and may not illuminate a deeply carved pumpkin as well. They are best for small faces, indoor windowsills or pumpkins with shallow-scraped patterns.
Traditional candles may look nostalgic, but they bring real fire risks. Dry leaves, paper decorations, flowing costume fabric, pets, wooden porches and crowded trick-or-treater paths are a poor mix with an open flame. Candles also heat the inside of the pumpkin, which can speed up softening and create smoke stains around the cut-outs.
To get the best glow, place the LED light in the centre of the pumpkin’s base. If the face appears unevenly lit, scrape a little more interior flesh from behind the darkest area. Do not pack the cavity with tissue paper, leaves or decorations around the light, even if it is battery-powered.
Where you place the pumpkin matters as much as how you light it. Set it on a stable, level surface away from stairs, railings, door swings and the main walking route. A pumpkin positioned directly on a step can become a tripping hazard, particularly when children in masks have limited vision. If the lantern is one piece of a larger display, our outdoor Halloween decorations guide covers lighting the rest of the porch and walkway.
For a safer porch display:
- Keep stairs, paths and the doorway well lit with regular exterior lighting.
- Place lanterns beside the walkway rather than in the centre of it.
- Keep cords, extension leads and decorations out of foot traffic.
- Bring lightweight props indoors if high winds are forecast.
- Move pumpkins under cover during heavy rain.
- Check that the pumpkin has not shifted or become soft before visitors arrive.
Families in rainy regions may want to place their display under a covered entry, while those facing early Prairie frost can bring carved pumpkins indoors overnight and set them out again before dusk. If wind is common in your area, a wider pumpkin on a heavy planter base is generally more secure than a tall, narrow one balanced on a railing.
Before handing out treats, do a quick Halloween-night check: turn on the LED lights, confirm the pumpkin is stable, clear wet leaves from the walkway, check the forecast and make sure the route from sidewalk to front door is bright and unobstructed.
The best jack-o’-lantern is not the most complicated carving on the block. It is the one your child helped create, that still has a cheerful face after a wet October week, and that welcomes neighbours safely from the porch.
Frequently Asked Questions
How do you carve a jack-o’-lantern safely with children?
Start by covering the table with newspaper or a washable plastic cloth, then have an adult cut the lid or a hole in the bottom using a sturdy pumpkin saw. Children can scoop seeds with a large spoon, trace a face using a washable marker and use child-safe carving tools for simple shapes. Keep the pumpkin on a non-slip towel rather than holding it in anyone’s lap. Choose big triangles, circles or a toothy smile instead of intricate details. An adult should always handle sharp knives and any cuts through the thick outer rind.
What tools do I need to carve pumpkins?
A basic pumpkin-carving kit is enough for most families: a small serrated pumpkin saw, scraper scoop, poker tool, washable marker and battery-operated LED tea light. Add a large metal spoon, bowl for seeds, cutting board or non-slip mat, and paper towels. Avoid using long kitchen knives, which can get stuck in the firm rind and slip when pulled free. For younger children, cookie cutters and a rubber mallet can make easy stars, bats or circles; an adult should hold and tap the cutters. LED lights are the safest choice for Canadian porches.
How do I choose a good pumpkin for carving?
Look for a pumpkin with a flat base, firm stem and smooth, unbroken skin. It should feel heavy for its size, with no soft spots, mould, deep scratches or damp patches around the bottom. A medium-sized carving pumpkin is usually easiest for a classic face — thinner walls than a big field pumpkin, with enough room for bold openings and an LED light. At Canadian farm stands and grocery stores, pumpkins are plentiful from Thanksgiving through Halloween. Choose one shortly before carving if possible, especially during a mild, rainy Ontario or coastal BC October.
What are easy jack-o’-lantern designs for kids?
Simple designs look best from the sidewalk and are much easier for children to help create. Try two triangle eyes and a wide smile, round “googly” eyes with a zigzag mouth, or a friendly ghost face with oval openings. Draw the pattern first in washable marker, keeping each cut-out at least 2 to 3 centimetres apart so the pumpkin stays sturdy. Younger children can choose the expression, draw the features or press cookie cutters into the rind. Older children can use a supervised pumpkin saw on pre-marked lines.
How can I keep a carved pumpkin fresh until Halloween?
Carve as close to Halloween as your schedule allows—ideally two to five days ahead in milder areas. Scoop out all loose pulp and wipe the interior dry, since leftover strands encourage mould. Store the pumpkin in a cool, shaded place overnight and bring it into an unheated garage or enclosed porch during heavy rain. In dry Prairie conditions, lightly misting the cut edges can slow shrivelling; in damp coastal BC or Atlantic weather, keeping it dry and well ventilated matters more. If it begins to shrivel, lightly mist the cut edges with water — but do not soak it, and skip the misting entirely if the pumpkin is already damp.
Final Thoughts
A great family jack-o’-lantern starts well before the first cut: choose a firm, evenly shaped pumpkin with an intact stem, then set up a clean, well-lit workspace where children can take part safely. Let younger kids handle the fun jobs—drawing a face, scooping seeds with a spoon or choosing the design—while adults manage cutting with child-safe carving tools and keep hands clear of the blade.
Simple, bold features usually create the best porch display. Large triangle eyes, a wide smile or an easy silhouette are quicker to carve, easier to see after dark and less likely to collapse than intricate details. Cut the opening from the bottom when possible, which helps the pumpkin sit neatly over a light and makes replacing it less awkward.
Canadian October weather can be unpredictable, from damp coastal rain to early Prairie frost. Keep your pumpkin in a cool, sheltered spot out of direct sun, bring it indoors during a hard freeze and remove any soft or mouldy areas promptly. For illumination, use a battery-operated LED tea light rather than a candle—especially on a busy porch with costumes, pets and excited trick-or-treaters. If those costumes are still being assembled, our DIY Halloween costume guide covers what actually holds up over a winter coat.
Make the process part of the celebration, not a race for perfection. A slightly crooked grin, a child’s original drawing and a safely glowing porch are exactly what Halloween memories are made of.