
Heads up: some of the links in this post are affiliate links. That means if you click and purchase, we may get a commission. It's how we keep this site running without cluttering it with ads.
By the first warm weekend in Ottawa, when the thermometer finally reaches 16°C and the last gritty snowbank has disappeared from the fence line, the lawn can look surprisingly green. Then comes the first mow. The mower thumps through a shallow dip near the driveway, scalps a raised patch by the back gate, and leaves you wondering how a yard that looked fine last autumn became so lumpy.
Canadian winters are hard on turf. Freeze-thaw cycles push soil upward, snowmelt reveals low spots that settled quietly under the snow, and pets, old roots, and last summer's mower ruts leave their own marks. The good news is that most of it is fixable without tearing up healthy grass. A thin topdressing layer of roughly 0.5 to 1.25 cm, a compatible soil-and-sand blend, or one carefully lifted piece of sod will smooth most problem areas while the lawn is actively growing. What follows is the DIY-scale version of that work: when to start where you live, what to spread, the tools that make it far less miserable, and the warning signs that mean you should stop and call someone.
Check Whether Your Lawn Needs Levelling or a Bigger Drainage Fix
A lawn can look surprisingly rough after a Canadian winter. In Ottawa or Winnipeg, repeated freeze-thaw cycles can leave shallow humps where frost pushed soil upward, while settling snow and spring runoff reveal little dips that were hidden under last year's growth. In Calgary, dry winds and compacted soil can make those uneven patches more obvious once the lawn greens up. Minor surface problems are usually manageable. The key is knowing when a bumpy lawn is a weekend project and when it is trying to tell you something more serious.
DIY work is generally suitable when the unevenness is shallow and localised. Look for:
- Small depressions that collect rainwater but drain within 24 hours
- Low spots roughly 0.5 cm to 5 cm deep
- Mild bumps that make mowing awkward or cause a mower blade to scalp the turf
- Settling near a former garden bed, old play structure, pet path, or frequently walked route
- Light frost heave that has lifted a patch of turf without changing the overall grade of the yard
Start by mowing the lawn, then inspect it from several angles in low morning or evening light. Shadows make subtle ridges and hollows easier to see. Lay a straight 2.4 m board across the area, or stretch a string between two stakes. The gap between the board or string and the lawn shows how deep a depression is. A long level can also help, although it is less useful on a gently sloping yard where water is meant to move in one direction.
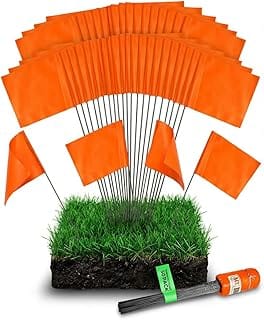
Mark problem areas with small utility flags, golf tees, or a light dusting of landscaping paint. The morning after a rainfall is the best time to do it, while pooling is still obvious. This saves guesswork when it is time to spread material. For a shallow dip, measure from the surrounding turf surface to the lowest point. If it is only 1 cm or 2 cm lower, topdressing can usually bring it up gradually without disturbing the grass.
Pause before adding soil if you notice any of these warning signs:
- Puddles remain for more than 24 to 48 hours after ordinary rainfall
- Water flows toward the house, garage, or foundation
- A depression is deeper than about 5 cm to 7.5 cm
- Ground repeatedly sinks beside a driveway, patio, downspout, septic area, or utility trench
- Exposed tree roots are creating large ridges
- The soil feels soft or hollow, or contains construction rubble
- Turf damage is accompanied by grubs, vole tunnels, or obvious animal activity
A persistent wet area may need a downspout extension, swale, catch basin, French drain, or broader regrading plan. Topdressing over it can briefly disguise the dip, but it will not correct the water source. Likewise, do not dig near suspected gas, electrical, cable, or irrigation lines. Contact your provincial utility notification service before excavating, and call a landscaper, drainage specialist, irrigation contractor, or municipal utility provider if the problem seems tied to buried infrastructure.
For the ordinary bumpy lawn, though, a measured approach works well: identify the cause, treat shallow areas slowly, and let healthy turf remain in place whenever possible.
Work With the Canadian Growing Season Rather Than Against It
The best time to smooth an established lawn is after spring thaw, once the grass is actively growing and the ground has dried enough to support your weight. This sounds simple, but timing matters more than most homeowners expect. Working saturated soil can compact it, smear clay into hard clods, and leave deeper footprints than the dips you were trying to repair.
Wait until snow has fully disappeared, frost has left the ground, and the lawn has been mowed at least once or twice. A useful test is to walk across the grass in regular shoes. If your heels sink in or the soil squeezes water around them, wait. The lawn should feel springy rather than spongy.
Across Canada, that workable window varies widely:
- Southern Ontario and southern Quebec: Many lawns are ready from late April into May, though heavy clay soils around Toronto, Hamilton, Ottawa, Montreal, and Laval may remain wet longer after a rainy spring.
- Coastal British Columbia: Victoria and Metro Vancouver often see earlier grass growth, sometimes by March or April. Wet conditions are the bigger concern here; avoid rushing onto rain-soaked turf.
- Prairies: In Regina, Saskatoon, Winnipeg, Edmonton, and Calgary, lawns may not be growing consistently until May or early June. Late frosts and drying winds can slow recovery.
- Atlantic Canada: Halifax, Fredericton, Charlottetown, and St. John's often have damp springs. Give the soil extra time to drain before raking or adding material.
- Northern communities and higher elevations: In places such as Whitehorse, northern Alberta, interior B.C. mountain towns, or northern Ontario, early summer may be the first realistic time for this work.
If you are not sure which window applies to your yard, our guide to Canadian gardening zones and planting dates breaks the country down zone by zone, and the same thaw-and-growth timing that governs planting also governs lawn repair.
For most cool-season lawns—Kentucky bluegrass, perennial ryegrass and fescues—the sweet spot is active growth in mild weather, often when daytime temperatures sit around 12°C to 22°C. This gives grass time to push through a thin topdressing layer before summer heat arrives.
Try to complete larger repairs before repeated temperatures above 27°C to 30°C, especially where watering restrictions are common. A stressed lawn may struggle to recover from being covered, lifted, or overseeded. In drought-prone Prairie cities, plan repairs for a mild stretch when you can water lightly and legally. Check local rules first; some municipalities restrict lawn watering by day, address, or season.
Avoid levelling during these conditions:
- Saturated ground after snowmelt or heavy rain
- A late-spring frost cycle, particularly if nights are still regularly below 0°C
- Mid-summer heat waves and drought stress
- Newly seeded or freshly sodded lawns that have not rooted well
- Very dry, hard soil that will not accept material evenly
Thin layers are the safest route. Healthy grass can grow through 0.5 cm to 1.25 cm of fine material far more easily than a sudden 5 cm blanket. If a low spot needs more height, build it over several applications, allowing two to four weeks of recovery between each one.
Choose Materials That Match Your Existing Lawn Soil
The material you spread matters as much as the technique. A bag labelled "topsoil" is not automatically suitable for lawn work. Some bulk soils contain stones, woody pieces, weed seeds, sticky clay, or construction debris that will make a smooth lawn rough again by July.
For most minor repairs, look for finely screened material with a loose, crumbly texture. It should pass easily through a rake and settle between grass blades without forming clumps. Ask a local landscape supplier what soil is common in your area and whether the product is screened for lawn topdressing. In many regions, buying a half-yard or full yard of bulk material delivered to the driveway is more economical than dozens of bags. For a few isolated dips, bagged products from garden centres are easier to manage.
Here is how common options compare.
Screened topsoil is a practical choice for shallow low spots that need more mineral soil. It is especially useful where the existing lawn is thin, sandy, or lacking depth. Choose a fine, screened product free of roots and rocks. The downside is that some topsoil can be heavy, particularly when wet, and poorly screened material can smother turf or leave lumps. Compost-rich topdressing blends work well for mild unevenness across a wider lawn, especially where soil is tired, compacted, or low in organic matter. Mature compost can improve moisture retention and soil biology, but it should be screened and fully finished. Avoid chunky compost with visible wood chips. It is also not the ideal long-term fill for a depression that repeatedly settles; organic matter breaks down over time and may contribute to further sinking. Soil-and-sand mixes are often the most versatile option for modest levelling. They spread more easily than straight topsoil while still offering enough soil content for grass roots. This is a sensible choice for many home lawns in Ontario, Quebec, the Prairies, and Atlantic Canada, where clay or loam soils are common. The mix should be reasonably compatible with the soil already in the yard.
Be cautious with straight sand. It is common on sports fields and golf turf, where regular sand topdressing is part of an established maintenance program. On a typical clay-heavy home lawn, repeatedly adding pure sand can create an awkward layered soil profile. In extreme cases, mixing small amounts of sand into clay without enough organic matter and proper blending can produce a dense, cement-like texture. Use straight sand mainly if your lawn is already sandy or if a turf professional has recommended it.
For a deeper isolated dip, soil plus lifted sod is usually the tidiest repair. You rebuild the surface under the turf rather than trying to bury grass beneath several centimetres of material.
When buying, favour products that are:
- Fine and consistently screened
- Free of visible debris and large clods
- Appropriate for local soil conditions
- Low-risk for weeds
- Dry enough to spread, rather than soggy and compacted in the bag
- Available in an amount that lets you apply multiple thin layers
A small wheelbarrow load may be enough for a few hollows. For widespread mild lumpiness, calculate the area before ordering. One cubic metre of material spread at 1 cm deep covers about 100 m², though it is wise to order slightly more for settling and uneven distribution.
Prepare the Lawn Carefully Before You Start Spreading
Good preparation makes lawn levelling easier and reduces the chance of damaging grass that is already healthy. There is no need to tear up an established lawn for minor corrections. In fact, preserving the turf canopy is usually the goal.
Begin with a mow. Set the mower a little lower than your normal height, but do not scalp the lawn. If you typically cut cool-season turf at 7.5 cm, bring it down to roughly 5 cm to 6 cm for this job. Shorter grass lets fine material reach the soil surface, while enough leaf blade remains visible to keep the plants growing.
Clear away sticks, leaves, gravel washed onto the lawn, and winter debris. Lightly rake out loose thatch if it is sitting on top of the grass, but avoid aggressive dethatching unless the lawn genuinely needs it. A lawn weakened by severe thatch, disease, or drought should recover before being topdressed.
If the ground is dry and dusty, water lightly the day before. The aim is slightly moist soil, not mud. On a warm, breezy day, a gentle watering can make raking smoother and help the new material settle. Do not water immediately before working if the yard has heavy clay; it may turn slick and compact underfoot.
Work in manageable zones. Start with the low areas that affect mowing, walking, and water movement. There is little benefit in spreading material over an entire yard if only three shallow depressions are causing trouble. Recheck each spot with the straight board as you go.
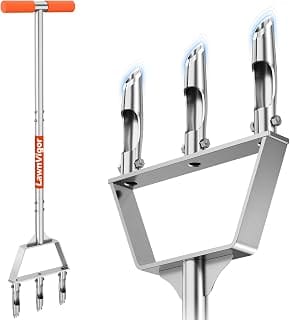
Aeration can be useful before topdressing when the lawn is compacted, especially in high-traffic areas near gates, patios, or children's play spaces. Core aeration removes small plugs of soil and creates openings for air, moisture, and fine material. It can help a topdressing blend make better contact with the root zone. For a city lot, a manual core aerator with hollow tines is enough to handle the worn strips near a gate or shed without renting a machine.
Skip aggressive aeration when soil is wet, turf is heat-stressed, or the lawn is already thin and struggling. On a mildly uneven but otherwise healthy lawn, careful topdressing alone is often enough.
The Tools Worth Buying for Lawn Levelling
You can level a small lawn with a shovel, a bow rake, and patience. But a few purpose-built tools make the job dramatically faster and produce a flatter finish, and most of them cost less than a single visit from a landscaping crew. These are the ones we recommend for Canadian home lawns, chosen on price, ratings, and availability on Amazon.ca.
| Tool | Best For | Why We Recommend It | Price |
|---|---|---|---|
| Whole-Lawn Topdressing | A 30-inch plate and long handle pull material flat across a wide area without stooping. Currently the top-selling rake of its kind on Amazon.ca. | $62.99 CAD | |
| Small City Yards | The same flat-plate design in a narrower head that steers between garden beds and stores in a condo locker or small shed. | $19.79 CAD | |
| Working Mix Into Turf | Brushing topdressing down through the canopy is gentler than raking it and leaves far more green blade showing when you finish. | $30.99 CAD | |
| Finding the Dips | Mark low spots the morning after rain while pooling is still obvious, then work to the flags days later when the ground has dried. | $19.67 CAD | |
| Compacted Traffic Zones | Hollow tines pull plugs so topdressing reaches the root zone. Enough for worn strips by a gate without renting a machine. | $58.99 CAD | |
| Deciding on Fertilizer | Twenty pH and nutrient tests cost less than one bag of the wrong fertilizer, and take the guesswork out of feeding a repaired lawn. | $18.63 CAD |
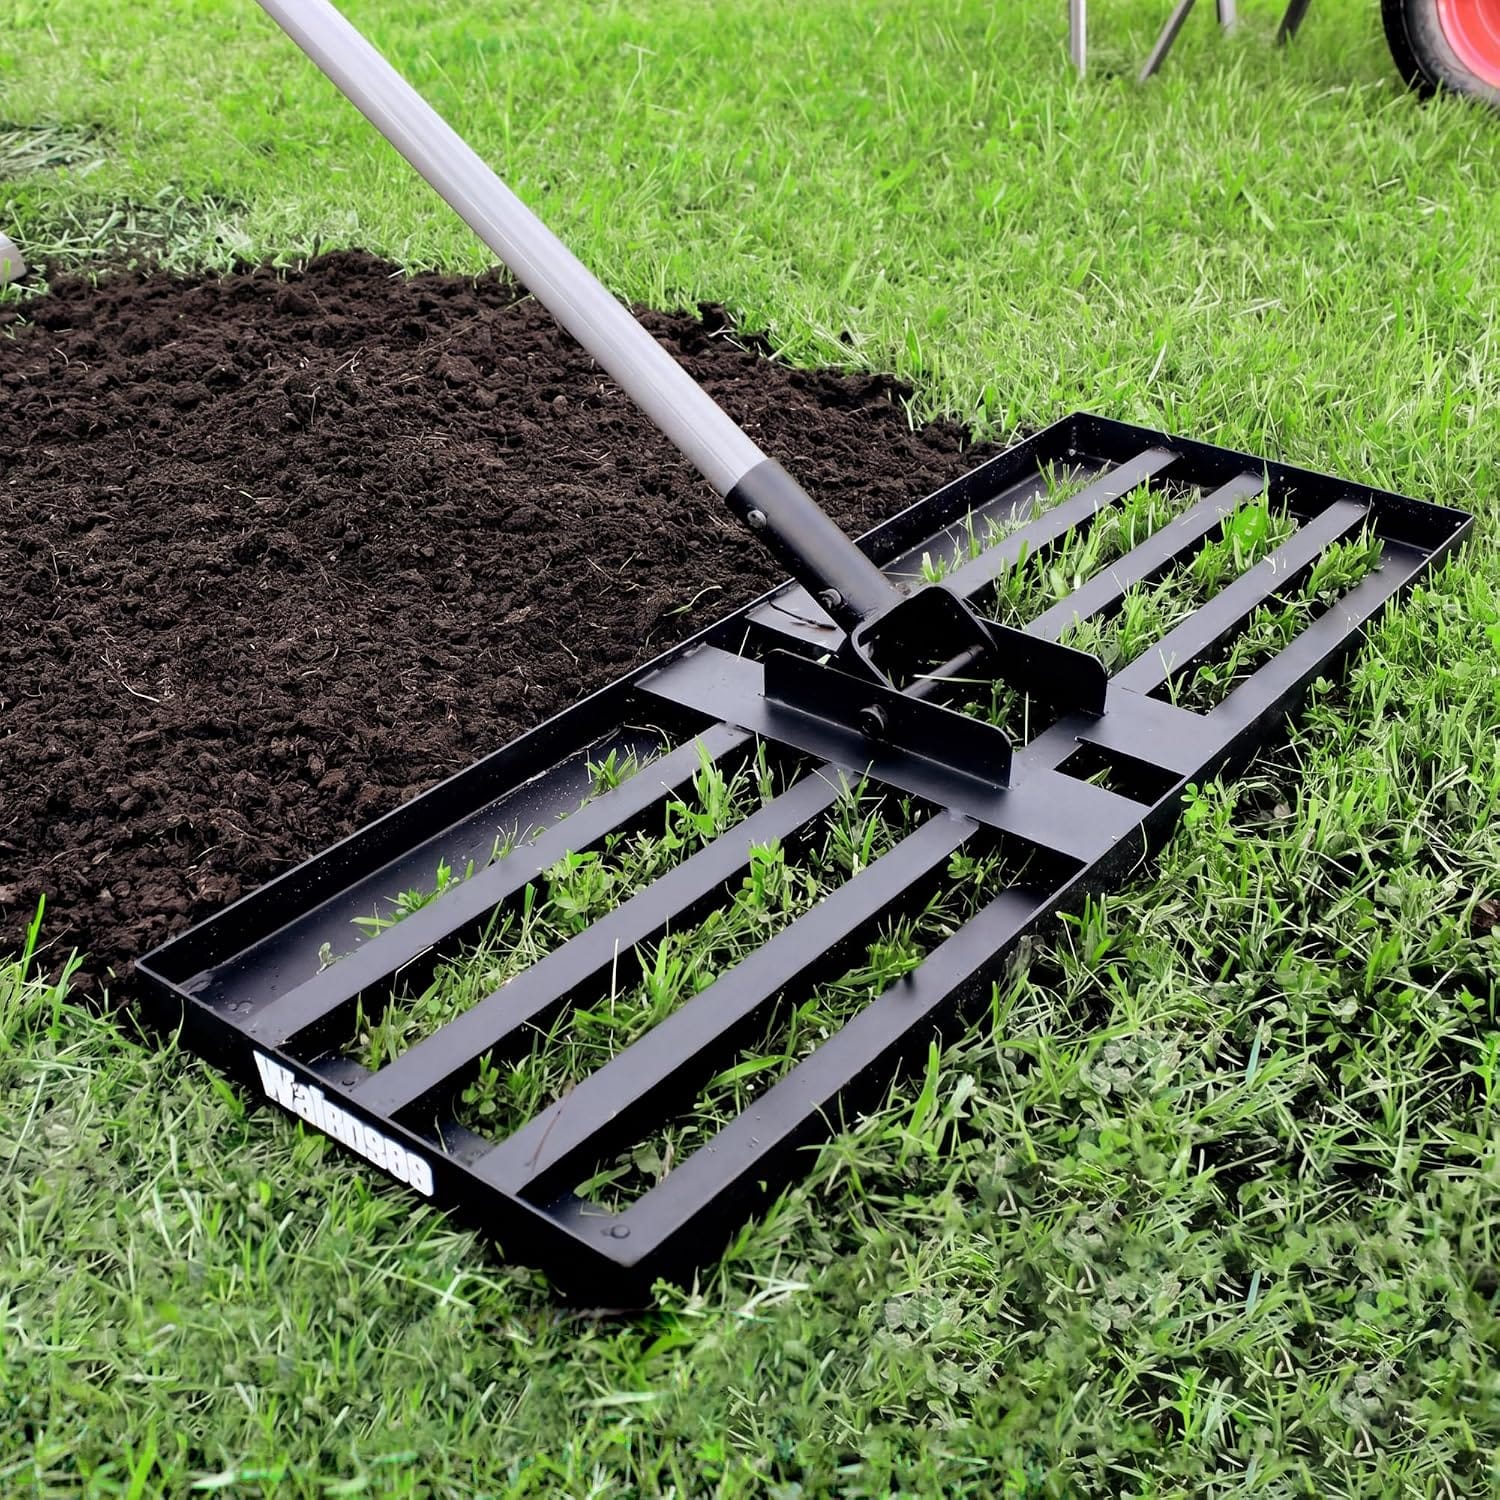
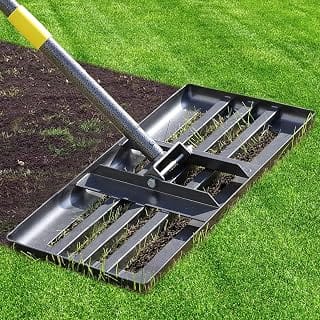


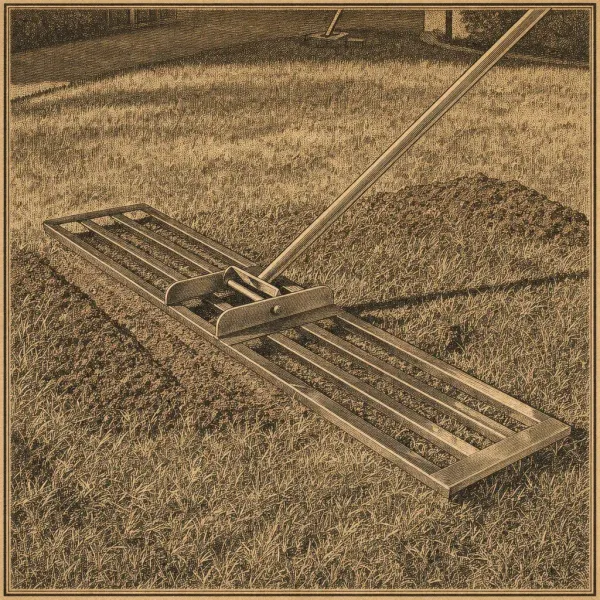
The one tool genuinely worth the money is a lawn levelling rake—a flat steel plate on a long handle, sometimes sold as a levelling lute or drag mat. Unlike a toothed garden rake, which pushes material around and leaves ridges, the flat edge shears soil off the high points and drags it into the hollows in one motion. A 30-inch plate suits an average suburban lot. For a narrow city yard with beds and pathways to work around, a smaller 17-inch head is easier to steer and considerably cheaper.
A stiff-bristled push broom is the underrated finisher. After the rake has done the heavy work, sweeping the surface knocks the last of the mix down between the grass blades instead of leaving it sitting on top where it can smother the crowns. Beyond that, most Canadian homeowners already own what they need: a mower, a bow rake, a flat spade, a wheelbarrow or a few buckets, a tarp to keep the driveway clean, and a straight board or string line for checking depth.
Renting is worth considering for one-time jobs on larger properties. Many Canadian Tire and Home Depot locations rent core aerators and power rakes by the day, which makes more sense than buying if you have a half-acre lot and no plans to repeat the work next spring.
Use the Right Repair Method for Dips, Bumps and Mild Lumpiness
There is no single best way to fix lawn unevenness. The right approach depends on depth, cause, and how much healthy grass is already covering the area. Start small. It is easier to add another thin layer later than to rescue turf that has been buried under too much soil.
For widespread mild unevenness, use light topdressing. Spread screened topsoil, a compost blend, or a compatible soil-and-sand mixture over the affected area at about 0.5 cm to 1.25 cm deep. Drop small piles with a shovel, then pull the material outward with a rake. Finish with a push broom or the back of a leaf rake, working it down into the turf canopy.
You should still see plenty of grass blades when you are finished. If the lawn looks like a bare dirt bed, too much material has been applied. Remove some before watering.
For shallow low spots, add material only to the marked depression. Feather it gradually beyond the edges so the repaired area blends into the surrounding lawn. A sudden raised rim is almost as annoying as the original dip and can show up clearly during mowing. Lay a straight board across the patch and pull material into any remaining hollow. Let the grass recover, then reassess after a few mowing cycles.
For a depression deeper than roughly 5 cm, use a lift-and-relay sod repair instead of trying to fill it from above. Cut around the low spot with a flat spade, keeping the sod section as intact as possible. Roll or lift it aside gently. Add screened soil beneath it, level the base, and lightly firm it with your hand or a hand tamper. Do not pack it hard. Replace the sod, press it into contact with the soil, and water thoroughly.
Small bumps can often be corrected the same way. First, identify the cause. A loose mound of soil from frost heave or settling may be easy to redistribute beneath lifted turf. A bump caused by a large tree root is different. Do not cut major roots simply to flatten the lawn; it can harm the tree and create a tripping hazard as roots continue growing. Consider a mulch bed or a professional arborist's advice instead.
Never dig into a bump that could be related to a utility line, irrigation pipe, buried debris, or a former construction area.
Common mistakes include:
- Filling a deep depression all at once
- Using wet, heavy, unscreened soil
- Spreading coarse material that cannot settle through turf
- Working on muddy ground
- Covering grass crowns completely
- Rolling or tamping the whole lawn heavily
- Trying to solve foundation drainage with extra topsoil
Slow, thin applications may feel less dramatic, but they protect the lawn and produce a more natural finish.
Help the Lawn Settle and Recover Before Summer Heat
Once material is in place, aftercare determines whether the lawn grows through the repair or struggles beneath it. The first week is about moisture, gentle mowing, and patience.
Water lightly after topdressing to settle fine particles into the grass and root zone. For lifted-sod repairs, water more thoroughly right after relaying the turf, then keep the patch consistently moist for the next 10 to 14 days. The soil should feel damp below the surface, not saturated. Constant soaking can wash material away, encourage fungal problems, and recreate the puddling you were trying to fix. A gentle shower setting matters more than volume here, and if your current hose kinks or bursts every spring, our roundup of the best garden hoses in Canada covers options rated for Canadian freeze-thaw cycles.
Resume mowing once the grass is actively growing and the repaired surface feels stable underfoot. Use a sharp mower blade and follow the one-third rule: never remove more than one-third of the grass blade in a single cut. During hot or dry spells, raise the mowing height. Cool-season turf generally handles summer stress better when maintained around 7.5 cm or a little higher, particularly in sunny yards across southern Ontario, the Prairies, and interior B.C.
If levelling exposed thin or bare patches, overseeding can help. For a small spring repair, use a seed mix suited to the light conditions in that part of the yard. Many Canadian lawns benefit from blends containing Kentucky bluegrass for durability and fine fescue for shade tolerance, and our guide to the best grass seed in Canada breaks down which mixes suit which region. Keep seeded areas moist until germination, but avoid washing seed out of a freshly levelled hollow.
Broad overseeding is often more successful in late summer or early fall, when soil remains warm but air temperatures are cooler and annual weeds are less aggressive. Spring seed can still work for small repairs, provided you can keep it watered and avoid herbicide applications around the new seedlings.
Fertilizer is optional unless a soil test or obvious nutrient deficiency suggests it is needed. A modest, slow-release lawn fertilizer may support recovery, but do not overfeed. Excess nitrogen can produce fast, soft growth that demands more mowing and may be vulnerable during a hot spell. An inexpensive soil test kit, a local garden centre, or an accredited lab gives more reliable guidance than guessing.
Monitor the repaired areas through the season. After a heavy rain, check whether water still gathers in the same place. Reassess after three or four mowing cycles, when grass growth makes the surface easier to judge. If a shallow hollow remains, add another thin layer only when the lawn is healthy and weather is favourable.
Long-term, small annual touch-ups are easier than waiting for a lawn to become deeply rutted. Redirect downspouts well away from the foundation, avoid repeatedly driving heavy equipment across wet turf, aerate compacted traffic zones when appropriate, and repair pet-worn paths before they become trenches.
If the same low spot keeps returning, puddles linger, or the grade directs water toward your home, stop adding material and get professional advice. A smooth lawn is pleasant underfoot, but proper drainage and safe grading matter far more.
Choosing the Right Approach for Your Lawn
For shallow dips, small bumps, and mild lumpiness, the right repair depends on what is causing the uneven surface. Start only after spring thaw, once the lawn has dried, greened up, and is actively growing. Southern Ontario, coastal British Columbia, and parts of Atlantic Canada may reach this stage earlier than the Prairies, northern regions, and higher elevations. Avoid working on saturated soil or during a hot, dry spell. A simple topdressing can correct minor settling, while recurring low areas, standing water, or slopes toward the house may indicate a drainage or grading issue that needs professional attention.
What Matters Most When Levelling a Lawn
Accurate Diagnosis of the Surface Problem
Walk the lawn after a rainfall and mark low spots with small flags or stakes. If water disappears within a day and the depression is only a few centimetres deep, it is usually suitable for a DIY repair. Check bumps as well: frost heave, shallow tree roots, buried debris, and compacted soil can all create raised areas. Use a straight board, rake handle, or string line to identify the true high and low points. Do not try to fill an area that consistently collects water, sits beside a downspout, or slopes toward the foundation. Those conditions call for drainage correction or regrading rather than repeated soil additions.
A Topdressing Mix That Matches the Existing Lawn
For most established turfgrass lawns, screened topsoil mixed with mature compost is the safest choice. It improves the surface while adding organic matter that supports root growth. A soil-and-sand blend can be useful where native soil is heavy clay, including many parts of southern Ontario and Manitoba, but it should be blended rather than applied as a thick layer of straight sand. Pure sand can dry quickly, create layering problems, and perform poorly in lawns with loamy or clay-based soil. Buy screened material free of stones, weed roots, and construction debris. The texture should spread easily through the grass blades without smothering the crown.
Shallow, Gradual Application Depth
The most reliable approach is to build low spots in thin lifts rather than burying healthy grass under one deep layer. Apply no more than about 1 to 1.5 cm of material across the lawn at once; use a slightly deeper fill only in a small, targeted depression, while keeping grass tips visible. Spread the mix with a shovel, wheelbarrow, landscaping rake, or levelling rake, then work it down through the turf with the back of the rake. Water lightly to settle the material. Deep holes may need two or three applications over a growing season, allowing the lawn to recover between treatments.
Timing for Active Growth and Weather Recovery
Cool-season lawns recover best when daytime temperatures are roughly 10°C to 20°C and there is enough moisture for steady growth. In much of the country, late spring is ideal once soils are workable but no longer muddy. Finish larger touch-ups before persistent summer heat arrives, especially in the Prairies, inland British Columbia, and areas prone to drought. If summer work is necessary, choose a cooler stretch, irrigate consistently, and avoid applying material when temperatures exceed about 25°C. Do not level during a wet period when foot traffic can compact the lawn or smear damp clay soil.
Tools and Aftercare That Protect Turf
A garden rake, flat shovel, wheelbarrow, stiff broom, and watering nozzle are enough for most small repairs, though a flat-plate levelling rake makes a noticeable difference on anything larger than a few dips. Mow the grass slightly shorter than usual before topdressing, but do not scalp it. For a bump, remove a small section of sod, shave away a little soil, replace the sod, and water thoroughly; this is less damaging than repeatedly rolling the lawn. Keep repaired areas evenly moist for two to three weeks, watering deeply when needed rather than giving frequent shallow sprinkles. Delay heavy foot traffic until the turf has grown through the new material. If the area fails to level or drainage remains poor, consult a landscaping or drainage professional.
Frequently Asked Questions
When should I level a lawn in Canada?
Start after the ground has thawed, the lawn has dried enough to walk on without leaving deep footprints, and the grass is actively greening up. In southern Ontario, southern Quebec, coastal British Columbia, and parts of Atlantic Canada, that is often late April into May. In the Prairies, northern Ontario, much of Quebec, and higher elevations, May or June is more realistic. A simple test: walk the lawn in regular shoes. If your heels sink or water squeezes up around them, wait a week. Summer levelling is possible but riskier. Stick to small areas, pick a mild stretch rather than a heat wave, and water consistently for the following one to two weeks. Early summer is generally safer than July or August, especially in dry Prairie cities or hot inland Ontario. Avoid working saturated ground after snowmelt or heavy rain, and check your municipality's watering rules before planning a repair you will need to irrigate. Cool-season grasses recover best when daytime temperatures sit roughly between 10°C and 22°C.
What is better for lawn levelling: screened soil, sand, or a soil-and-sand mix?
Screened topsoil or compost-rich lawn soil is usually best for minor depressions in established Canadian lawns because it supports root growth and matches most residential soil. Straight sand can improve surface smoothness, but it may dry quickly and can create a distinct layer if it is repeatedly added to clay-based soil. A blended material, such as screened loam with some sand and compost, is a practical middle option and spreads more easily than heavy topsoil alone. Use a product free of stones, sticks, and weed seeds, and check that it is dry enough to spread rather than soggy in the bag. Match the material to the existing lawn soil rather than relying on sand alone. If your yard is already sandy, sand-heavy topdressing is fine; on the clay common across southern Ontario, Manitoba, and parts of the Prairies, a blend is the safer choice.
How much topdressing can I apply at one time?
Keep each application thin: about 6 mm (1/4 inch) over the general lawn, or up to 12 mm (1/2 inch) in a targeted low spot if grass blades remain visible. Several light applications are much safer than one deep fill, because grass can grow through a thin layer but suffocates under a thick one. A 30 L bag covers roughly 5 m² (about 50 sq. ft.) at a depth of 6 mm, although coverage varies with settling and product moisture. For a dip deeper than 25 to 50 mm, fill it gradually over multiple applications spaced two to four weeks apart, or lift the sod, add soil underneath, and relay it. If the lawn looks like a dirt bed when you finish spreading, you have used too much; pull some back off before watering.
How do I use a lawn levelling rake?
A levelling rake is a flat steel plate on a long handle, not a toothed garden rake. Mow first and cut a little shorter than usual, then drop small piles of topdressing mix around the low areas rather than dumping one large heap. Set the plate flat on the turf and pull it toward you in short, overlapping passes, working across the lawn in one direction and then again at right angles. The flat edge shears material off the high points and drags it into the hollows, which is why it works better than pushing soil around with a bow rake. Keep the strokes light; you are redistributing a thin layer, not grading a driveway. Most levelling rakes have an adjustable head angle, so tilt it until the plate skims rather than digs. Finish with a push broom or the back of a leaf rake to work the last of the mix down between the grass blades, then water lightly. A 30-inch plate suits an average suburban lot, while a narrower head is easier to manoeuvre in a small city yard.
How much does DIY lawn levelling cost in Canada?
Small repairs are relatively affordable. Expect to spend roughly $5 to $12 per 30 L bag for screened topsoil, lawn soil, or compost blend, depending on region and product quality. A few shallow depressions may need only $30 to $100 in materials. For larger areas, bulk screened soil can offer better value, but delivery charges can make it less economical for a small city yard. Tools add a one-time cost: levelling rakes run from about $20 for a compact head to roughly $65 for a full-size model, and a stiff push broom is around $30. Renting a core aerator for a day is often cheaper than buying one if you only expect to do the job once. Professional assessment is worth the cost if drainage or major settling is involved, since no amount of topsoil will fix a grading problem.
Final Thoughts
A smoother lawn starts with an honest assessment. Small dips, shallow bumps, and light settling are usually manageable with patient topdressing, a soil-and-sand blend suited to your turf, or carefully targeted repairs. The goal is not to bury healthy grass, but to build low areas gradually in thin layers so the existing lawn can keep growing through the work.
Timing makes a major difference across Canada. Wait until the ground has thawed, the lawn has dried out, and active growth has begun. That may be early spring in coastal British Columbia or southern Ontario, while Prairie, northern, and higher-elevation properties may need to wait several weeks longer. Avoid working on soggy soil, and aim to finish larger touch-ups before prolonged summer heat or drought puts extra stress on the grass.
Use a rake or levelling tool to spread material evenly, water lightly afterward, and keep the repaired areas consistently moist until the turf has grown through. Check the surface again after mowing; a second light application is safer and more effective than trying to correct a depression all at once. For raised spots, remove only a small amount of soil or lift the sod and adjust the base rather than scalping the lawn.
Once the surface is smooth, the rest of lawn care gets easier — even mowing height, better water distribution, and fewer scalped patches for weeds to colonise. If dandelions move into the thin spots while the new grass fills in, our guide to getting rid of dandelions in Canadian lawns covers what actually stops them coming back.
If water repeatedly pools, soil keeps sinking, or the grade directs runoff toward your home, stop treating it as a cosmetic lawn issue. Those signs may call for drainage, irrigation, or professional grading advice. Work slowly, respect the season, and your lawn can become flatter, healthier, and far more enjoyable underfoot.